Migrating Home Assistant to Proxmox

So as I have posted elsewhere, I’ve been running HomeAssistant for a bit now. I started out like most do, a Home Assistant Operating System (HAOS) installation of a Raspberry Pi. When I first set all this up, the Pi 4b with 8GB RAM was the most powerful offered, and its getting a bit long in the tooth already for what I am throwing at it. I recently picked up a few Pi5 boards for a couple projects and debated using one and moving HAOS over to one of them. After doing some research, and crunching numbers I decided to build a Proxmox server on a small mini-PC.

I probably could have gotten away with a Pi5, but I wanted more flexibility and the ability to run other containers and VMs all on a single machine. This greatly simplifies my environment, provides more ‘umph’ to the system … and well inspired my inner geek.

The following is the start of a series of articles I am putting together to document what I did, why I did it, and maybe help you with your Home Assistant environment – you can learn from my mistakes — and some sucesses!

I owe a ton of gratitude and thanks to TTekster over on GitHub and his Proxmox helper scripts! These make deploying all of this simple, fast and straight forward.

Why Migrate from the Pi to Proxmox?

The Raspberry Pi Charm?

  • We all love Raspberry Pi for its affordability and accessibility. It’s like the Swiss Army knife of tech gadgets – small but mighty. However, as your smart home grows, so do the demands put on that board.


Enter Proxmox: A Game Changer

  • Proxmox VE (Virtual Environment) offers a robust, scalable, and more stable platform for running Home Assistant. It’s like upgrading from a cozy cottage to a smart mansion.

What's "Proxmox"?

Proxmox is a virtualization platform, allowing you to run multiple virtual machines (VMs) and containers on a single physical server. Think of it as having multiple mini-computers on one device. 

Benefits of Proxmox for Home Assistant

  • Comodity devices & hardware: You can install Proxmox on an old laptop or desktop – on up to server class rackmount machines.
    •  I installed my system on an Intel i9 based NUC (more on this below).
  • Stability and Power: Proxmox provides a more stable and powerful environment than a Raspberry Pi, especially for larger, more complex smart home setups.
  • Scalability: Easily scale your system as your needs grow without the need to buy new hardware.
  • Flexibility: Run multiple services alongside Home Assistant without affecting performance.
  • Snapshot and Backup: Proxmox offers advanced snapshot and backup features, crucial for a smart home system.

Measure once - deploy once (or twice 🤣)

Exploded view of the NUC (mini PC) I purchased for deploying Proxmox and Home Assistant Before starting any solution or deployment, no matter the scale, you really need to sit down and grab that napkin on the desk to work out what your plans are – and the hardware required to pull it off. How much CPU, RAM, storage do you need? Do you need a run a GPU or TPU for AI models? Do you want remote access? How is it connecting to your network and at what speed? These are just some of the considerations to think about.

Once you think you have a good idea on the hardware resources you will need – add 25-50% just in case. Today the difference is negligible from a cost perspective, and having headroom in your deployment’s resource utilization will save you time, money and headaches later.

After I sat down and noodled on this for about a week, I came up with the following list of services and VMs I wanted to deploy

This list may seem like a lot to put on one device, but its really not. I found a NUC that I liked on Amazon, i9 20 core device with 32GB RAM and 2TB NV Drive. I had two 32gb DIMMs from another project on my desk, so I knew I would upgrade it to 64GB RAM. I also had a 2TB SSD drive which I earmarked for even more storage (can you ever really have enough?).
Two days later (Yay Prime Shipping!) I got my hardware delivered, swapped out the RAM and installed the SSD drive in the case.
Screenshot of my Proxmox interface with a few of the containers setup and running
PREVIEW: My Proxmox interface with a few of the containers setup and running

Conclusion (for now...)

Migrating from Raspberry Pi to Proxmox for Home Assistant is like moving from a bicycle to a sports car. It’s faster, more powerful, and gives you that “tech adrenaline” rush. Stay tuned for the next article, where we’ll dive into setting up Proxmox for your Home Assistant. It’s going to be a tech adventure, and we can’t wait for you to join us!

Whats next?

In the following articles in this series, I’ll cover:

  1. Setting Up Proxmox: From installation to creating your first VM.
  2. Backing Up Home Assistant on Raspberry Pi: Safeguarding your current setup.
  3. Installing Home Assistant on Proxmox VM: Laying the foundation of your new smart home.
  4. Restoring Home Assistant on Proxmox: Bringing your smart home to its new residence.
  5. Optimizing and Troubleshooting: Fine-tuning and problem-solving.

Sharing is Caring

2 Responses

  1. Hi John,

    I hope you are doing well. I’ve been on this home automation path as well and was curious why you chose Proxmox over Portainer (which I love).

  2. Hey stranger!
    Honestly, because I needed to run some VMs, especially with Home Assistant using HAOS is a lot cleaner and more straight forward than running through docker.

    I actually have a Ubuntu VM running in Proxmox that is running Docker and Portainer for things that work better in a docker container than an LXC … sorta the best of both worlds….

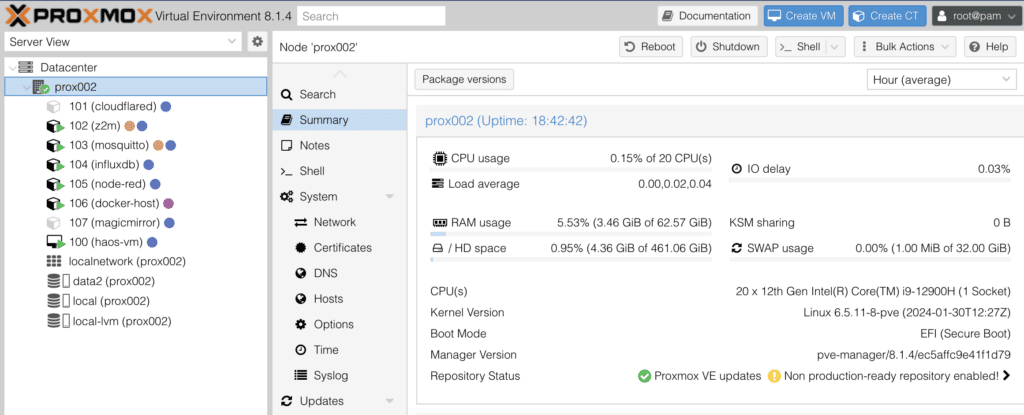
    I should put together a post about my Proxmox setup in general. I have about a dozen systems running on it with barely any CPU / RAM impact so far – cloudflared, letsencrypt, grocy, HAOS, mosquitto, zigbee2mqtt, kali linux, influxdb, grafana, node-red etc all each in their own VM or LXC. On the docker side so far Heimdall and Portainer but there are a few in queue for setup and deployment when I get a few hours of me time.

    Hope you’re doiing well Joe!

Related Posts

Computing

Lightroom to Instagram Plugin

Push photos from Lightroom to Instagram So for years I’ve had a dormant Instagram account that I rarely used as it was too much work to move photos from Lightroom over

Read More »