
Why Proxmox?
Preparing for installation
Selecting the right hardware
- Mini-PC: Intel 12th Gen i9 processor 20 cores
- 64GB DDR4 RAM
- 2TB PCIe NVMe M.2 SSD
- 2TB SATA III 2.5″ SSD
- Coral.AI USB Accelerator coprocessor (TPU)
Preparing the Proxmox Install Media
The Proxmox system is available in a commercial/enterprise version and a free community version. For our purposes, we are using the community edition. Download the Proxmox VE ISO Installer from their website. As I am writing this, the current version is 8.1-1 and was released on 23 November 2023.
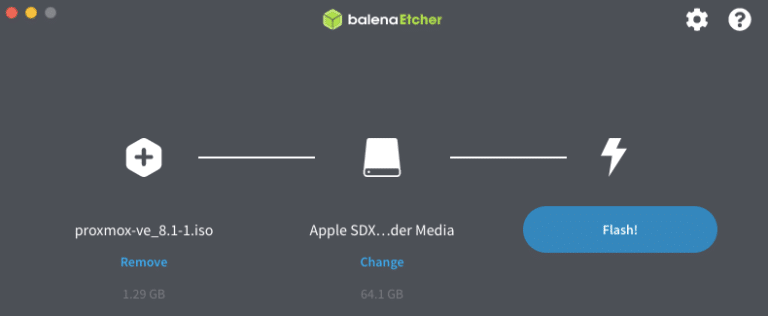
Once you have the ISO downloaded, you need to ‘burn’ it to the USB Stick. You can use Etcher to do this on many OSes and its straightforward. Once you’ve downloaded and installed Etcher you run the program, select the ISO file you downloaded, the USB stick you are writing it to, and hit the “Flash!” button in the UI.
Depending on your OS an permissions, you may be asked to provide the password of a user with the necessary rights. Once started it takes a couple min to write the media and validate.
Installing Proxmox on the device
Now that you have your installation media and target hardware ready, its time to get this show on the road. You will need the device you are installing Proxmox onto, with a keyboard and mouse connected and network attached,. Don’t use WiFi for this server! Use a network cable attached to a hub or switch. This will seriosly improve stability & speed. Additionally when the fit hits the shan troubleshooting will be a lot more straight forward. I have mine connected to a 2.5gb switch hanging off my Firewall. This allows me multiple segmentation options as well.
Ensure the machine’s BIOS is set to boot off USB, that Virtualization options are enabled (VT-x, AMD-v, SVM or similar options) and that Intel VT-d or AMD IOMMU are also turned on. These specific options are dependent on your BIOS setup – refer to the documentation for instructions on how to enable/disable various entries.
Now that the boring bits are out of the way, plug your USB drive with the Proxmox install media into the device and power it up. After a moment you will be presented with the Proxmox VE Installation Boot Screen. You can do this using the graphical or text based installs. Both work exactly the same, it really is up to your preference.

Proxmox Installation Flow and Options
For the purposes of this article, I am using the graphical installation path. Proxmox provides some great documentation, which you should check if you have any issues during the install. You may also want to check out some of the advanced options – I am not going to be discussing them here as I didn’t need them, and they are for more experienced users and use cases.
You will be presented with the EULA and then options for your hard disks. I recommend sticking with the defaults here unless you are really sure you know what you’re doing. EXT4 and LVM-Thin is the default and what I went with. This configured only the NVMe drive, but you can add a second, third or other drives later. If I had to do it over again, I may think about using ZFS, but honestly, for a home assistant soltution LVM-Thin is good enough. Keep in mind using ZFS over a hardware RAID is not supported and can seriously go sideways losing your data … KISS (Keep It Simple Stupid).
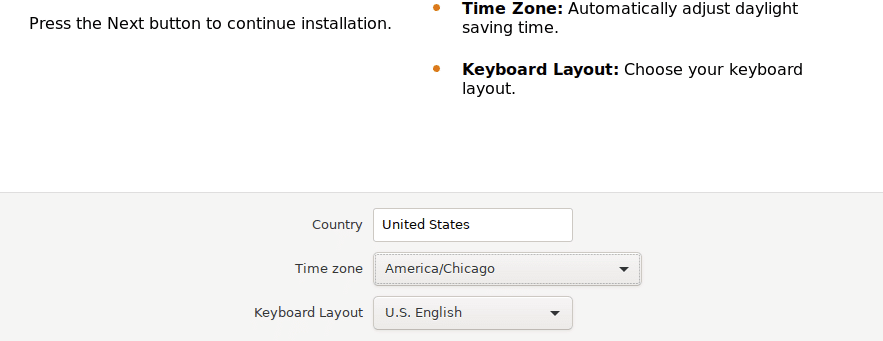
The next screen you will be asked for location, time zone and keyboard information. This should be auto-detected but I’ll say its not fool proof
The next page will ask you to set a root password for the installation. Make this a STRONG password. I don’t care that its in your house and no one will have access (or so you think). Secure this account. Make the password long, 15-20 characters mixing them up with upper and lower case characters, numbers, and special characters. If you need help with making a random password <try this>. For additional information on passwords and why you want a strong one check out this article elsewhere on the blog.
You will also need to provide an email address for alerts and notifications from the system. This needs to be a real address for you to receive alerts and notifications, don’t use a fake one – you may regret it later (don’t ask me how I know this LOL).
One of the last bits for the installation is to set up the network of the device. I am going to say it again, use a physical network not wifi for this! I set up an ip4 address using dhcp initially for the install. You can assign EITHER an ip4 or ip6 network address during the initial setup. Once I got through the configuration and installation, I created a permanent dhcp lease on my firewall for the device by its MAC address and rebooted to have the Proxmox server use the right IP. For the install it really didnt matter in the least.
Next you are presented a screen to confirm all your settings then hit install and relax and let it do its thing.
Post install clean-up
Once your machine reboots post installation you can do the rest of this work from a laptop or other remote box. Open a browser to https://<ProxmoxIP>:8006 (https://192.168.1.25:8006 as an example). Your browser is going to complain about TLS certificate issues, just click through and accept. I will walk you through how to set up Let’s Encrypt with Proxmox in a future article in this series..
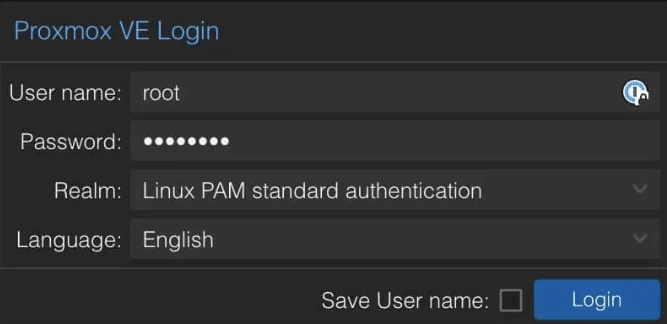
Once you navigate to the Proxmox UI you will be prompted to log in. You will use root as the login name, the password you set during the installation as the password. Make sure to choose Linux PAM for the realm. You may not see the icon in the User Name field on the right, that is for my password manager 1Password.
In the first article in the series, I mentioned TTeck‘s Proxmox scripts in passing and that I owe a huge debt to them for their Proxmox scripts – you are about to see why…
After installing Proxmox, and before setting up any VMs or containers, there are a few clean-up items to take care of. The good news is that the TTeck Proxmox scripts do all the heavy lifting for you.
To run these, you navigate to the console of your Proxmox node and in the terminal, enter the following command (click to copy) and hit enter:
bash -c "$(wget -qLO - https://github.com/tteck/Proxmox/raw/main/misc/post-pve-install.sh)"
This cleans up the apt repositories used to make sure you are using the non-enterprise (a.k.a. Free Repo), enable the ceph repositories and do a bunch of housekeeping items that need to happen before you take your new Proxmox server for a spin.
Once this is completed, you can follow along in the next articles in the series to prepare your existing HAOS environment to migrate (unless you want to take this as an opportunity to rebuild — I did), install HAOS VM, and other containers that you can use for your home automation solutions.
There are other scripts in this archive that you can use to tune your services – I recommend the Intel Microcode update, and also the Monitor-All scripts
This is just the first part of a detailed series. The following articles will explore the migration process in depth, ensuring you have all the knowledge and tools at your disposal.
Articles in this Series:
- Migrating Home Assistant to Proxmox
- Proxmox: Installation & Configuration ← You are HERE
- Proxmox with a Home Assistant VM
- Home Assistant: Post Proxmox Install
- Extra Credit: Getting Zigbee2MQTT and other tools setup and integrated
There is also a "prequil" to this series: My Home Automation Journey.