Home Automation, or has my house become self-aware?
SkyNet Be Damned! I’ve been playing around with Home Automation and SmartHome IoT technology for a couple of months and went searching for a way to map out all the connections, dependencies and devices in the house. I tripped across SmartHomeDB on my twitter feed and gave it a shot. Understanding which bits work with other bits, as well as the communication paths has helped me troubleshoot the majority of issues we’ve had with distances between devices, hops, etc. Having the compatibility information for each device is a great feature!
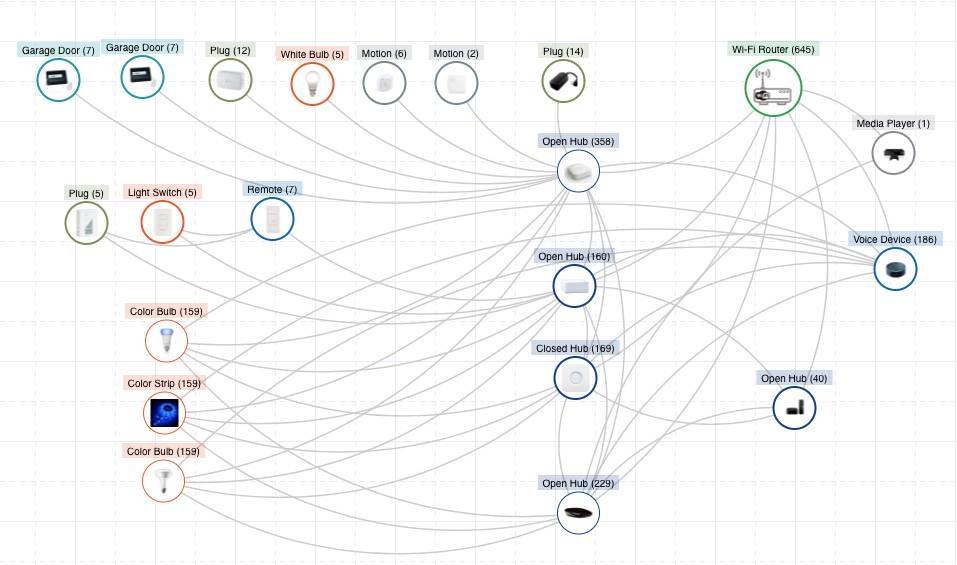
Click to open SmartHomeDB in a new window
The map above shows all the various device types, open or closed ecosystem hubs, and interconnections between everything. When I tried to work out the best placement for hubs, Zigbee or Z-Wave devices and the mesh network created this can be a boon.
Here’s where the project is currently:
- Hubs and Controllers
- Amazon Echo Dot – because getting up to flip a switch is so unnecessary (mostly)
- SmartThings Hub – central control for all non-security related systems
- Lutron Caseta Hub – controls all the Lutron dimmers and switches throughout the home
- Philips Hue Bridge – manages the Hue Bulbs and Lightstrips via SmartThings and/or Hue App and Amazon Alexa
- Harmony Elite Remote and Hub – controls all the home theater, video games and similar for the family room
- Lighting
- Lutron Caseta Wall Dimmer Switches – Controlling all of the light fixtures
- Lutron Caseta Wall Switches – Controlling ceiling fans – do NOT use dimmer switches on ceiling fans!
- Various Philips Hue color light bulbs, spot lights and LED strips
- Cree Zigbee Connected LED Bulbs
- Sensors
- ZooZ Z-Wave 4-in-1 Multisensor
- SmartThings Motion Sensor
- SmartThings Water/Moisture Sensor
- Outlets
- Lutron Caseta Lamp wall module
- GE Lamp wall module
- GE Outdoor ZWave plugin module
- Miscellaneous
- Schalge ZWave Electronic Deadbolts
- GoLinear Garage Door Openers
- Basic LED Bulbs (Dimmable)
Home Automation: Ready Fire Aim … let’s try that again!
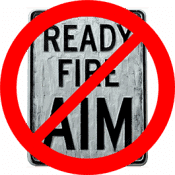
So above is a good representation of what I’ve deployed, but not how I got here – and all the screwups I made along the way. Before you buy anything think about what you are going to do and build a network to support it! Create a separate VLAN for all your Home Automation devices, hubs and what-not. This will save you a ton of aggravation later, and minimize the impact, albeit minor, the devices will have on the rest of the network. If you want to get real fancy, you can then use ACLs on your router/switch to make sure only the services you want can access your IoT VLAN, and that your IoT VLAN is (mostly) segmented off your core home network. I said mostly because I found out that in my case it was easier to punch a hole in the firewall between my IoT VLAN and specific devices on my Home Network. These are things like my AppleTV, XBox, Denon AV unit, and other home entertainment devices that I installed long ago. Honestly, I probably could have moved things around, but I was too damn tired at this point 🙂
If you are using WiFi, keep in mind you will need to have a wired network for most of the hubs – a small 8 port gigabit switch can work wonders hanging off the WiFi router, assuming it supports VLAN segments on the wired side …
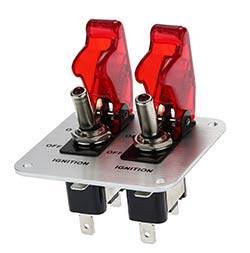
If you have a home security system, keep that the hell away from anything else. You will save yourself tons of pain, and you may save your property as well. Go back and re-read that sentence again… seriously! Home Automation systems have not had a great track record when it comes to security, and you don’t want your alarm system compromised due to a buggy light bulb, right?
Measure once cut twice … or something like that

You see a pattern here – think then do! Before you start jumping in and buying things, learn from a couple mistakes I made along the way. Decide where you want the wall switch to control your lights, and where you want to have specialized lighting such as Philips Hue colors.
I am (now) a strong proponent of having smart wall switches as opposed to smart bulbs. First off, this way is cheaper in the long run as they can control just about any dimmable bulb. Secondly, having to explain to everyone not to turn off light switches in an existing structure is more trouble than it’s worth. Having smart bulbs requires constant power to them, and if you flip the switch they are no longer controllable via your apps and there be dragons! Without the smart wall switches, the WAF was low.
Now that you figured out where you want wall switch controls versus specialized lights that require special apps (and constant power) you can install your wall switches, and take note of switches that are no longer needed. Here you have two options, wire the circuit open and cover it with a wall plate, which I don’t recommend, or get some light switch guards to prevent people from accidentally turning things off and throwing your smart home automation into a tailspin.
Now you are ready to begin installing your wall dimmers FIRST … I repeat buy them FIRST and resist the temptation to hook everything up. The Lutron switches I used can work with or without any home automation systems. Without a Caseta Hub they are just regular (yet expensive) run of the mill wall switches and dimmers. This will allow you to avoid the next mistake I made. Buying smart bulbs that I didn’t end up needing – but found applications for because … well … I have ’em.
Fixin’ to get ready
So, you have your network (knotwork?) humming along, and your light switches deployed and working, where do you put all this hub/controller crap? Honestly, it really does depend on your home size and construction. My house was built about ten years ago, and I ran ethernet cables throughout the house while it was still just studs – just in case I needed them. This allowed me a lot of flexibility and range/mesh options for the various hubs and controllers.
Now that you are ready to get going, plugin any of your Z-Wave or ZigBee devices and install / configure the SmartThings hub. Once that is out-of-the-way, start configuring your devices. If you have something that can’t be discovered, chances are it requires a special DTH (device type handler). There is a great community over at the SmartThings forums. It’s a safe bet someone has already created and shared what you need. Don’t get all fancy yet – just make sure things turn on/off, etc.
Flip that switch!
Now you have your basics done, you have a choice, sit back and let things ‘burn in’ of take the safeties off and flip that switch! I say damn the torpedos and go for it!
I would suggest now that you sync your Lutron Caseta hub and SmartThings so that you can control all the wall dimmers. First, install and configure the Caseta, sign up for the requisite account and download the app for your phone. Follow the instructions to get all your switches and Pico Remotes (if any) setup in Caseta’s hub. Please think about naming conventions for these, see my earlier post about naming convention hell. Getting this out-of-the-way will allow you to do more of the sexy bits that I will need to cover in a later post.
If you’ve been following along, you now have all of your light switches available in SmartThings. You can start creating Routines, using SmartApps and doing any of the automations based on triggers.
Extra Credit – Home Automation with Amazon Echo
At this point, I would start looking into Echo for voice control. I will get into more details in the next post on this, but Echo is extremely simple to set up. Now that you are set up and running with Echo, simply install the SmartThings Skill and follow the prompts. You will now be able to use Echo to manage anything tied into SmartThings directly or through integration. You will need additional Home Automation Skills, but not just yet 🙂
And do try “Alexa, never gonna give you up” so you can get RickRolled by your Home Automation Assistant!
More to come … stay tuned …